Objective
Build a system that allows me to install a Debian server or laptop with minimal human intervention.
Git Repository
https://gitlab.com/matajira/pxe_boot
Alternative Review
As with everything in technology, the world of server/laptop installation is bigger than I thought, and there are plenty of alternatives. My objective here is just to enumerate a few that I considered when building this project:
The first alternative is doing all the process by hand. Plug in a memory stick, boot the machine with it and follow the installation procedure. This system allows for flexibility, you can change the username, the language, the partition etc.
But this type of work is very ungrateful and does not scale very well.
The second alternative is to copy the hard disk from a ‘Golden Image’ to the new machine. And then perform the necessary customizations. A tool that could help in this regard is Clonezilla. Clonezilla can be used ‘manually’ to generate and load an image, but it could also work in a more automated fashion by putting for example the disk images in an NFS disk, and modifying kernel boot parameters.
The third alternative is using a tool called FAI (Fully automatic installation). FAI is renowned to be quite flexible and could be quite interesting to explore. Probably if I do the project all over again I would try to do it with FAI.
The fourth is netboot.xyz, which allows you to boot several operating systems with a friendly graphical interface. However, I am not sure if you could customize the installation.
The fourth is using the Debian Installer with pre-configuration files. This is the approach that I took. I wanted to try the ‘Debian’ way, and frankly, at the beginning of the project, I did not know any other way.
‘Development’ environment
These types of projects are “try, fail, repeat” in nature, so the faster we can iterate the better.
Hence, before touching any hardware, I set up a ‘development’ environment with Virtual Box and Vagrant.
My setup involves two virtual machines, one that is the ‘server’ and the other will be the ‘client’. What I am trying to replicate is a situation in which I have a laptop that when plugged via ethernet to another machine, will be formatted and installed automatically.
So for this, these two VMs will share a private network 172.16.56.0/24, and only the ‘server’ will have access to the outside. This does not need to be the case, but network/pxe booting relies on getting the booting information from the DHCP server, if the laptop is connected to multiple networks, how can I tell it to boot according to this interface and not the other? If you have the answer don’t hesitate to contact me.
Vagrant.configure("2") do |config|

  config.vm.define "server" do |web|
    web.vm.box = "debian/bullseye64"
    web.vm.provision "shell", path: "script.sh"
    web.vm.network "private_network",  ip: "192.168.56.2"
  end

  config.vm.define "client" do |client|
    client.vm.box = "debian/bullseye64"
    client.vm.network "private_network",  ip: "192.168.56.3"
  end
end
I wrote ‘script.sh’ which has all the installation procedures for the server.
Then, the iterations would take this form:
- vagrant up
- Modify VirtualBox to boot the client machine from the network, and see if it works
- vagrant provision, to change the configuration of the server (or vagrant destroy followed by vagrant up).
Project explanation
I based this project mainly on Debian’s ‘PXEBootInstall Installing Debian using network booting’ (https://wiki.debian.org/PXEBootInstall) and other sources.
The following is a guided walk-through of the script I wrote/adapted to provision the server.
Necessary packages
For this setup, I used Debian 11 for both the server and the client.
Below is the list of necessary packages for the server.
apt-get update
yes Y | apt-get install isc-dhcp-server
apt-get install -y tftpd-hpa debian-installer-11-netboot-amd64 tftp-hpa vim dnsutils net-tools bind9 and bind9utils
DEBIAN_FRONTEND=noninteractive apt-get install -y apt-cacher-ng/bullseye-backports
isc-dhcp-server is the dhcp server, tftpd-hpa is the tfpt server, debian-installer-11-netboot-amd64 is the installation source files for debian 11 with i386 architecture, bind9 is the dns server.
I use apt-cacher-ng to cache the debian packages for the laptop/client installation. It makes a difference in installation time. However, to make it work, you need to use the version coming from the backports (the older version has a bug). The rest of the packages are utilities to make my life easier.
Server IP address configuration
As stated before, the network range is 192.168.56.0/24.
The server has the static address 192.168.56.2, the configuration of this address was done by Vagrant and Virtualbox.
DHCP configuration
In /etc/dhcp/dhcpd.conf I provided the basic configuration of the network.
And I also specify that the ‘server’ also is the DNS server, and the ‘router’ or gateway of the network: all of these services point to 192.168.56.2.
When a machine is booting, and requests the DHCP server for additional information, the ‘server’ will provide the network information and will tell it to boot using the filename ‘pxelinux.0’
Concerning the tftpd client part the if/else statement tries to capture a corner case, but at then end it will simply use ‘pxelinux.0’
cat <<EOF > /etc/dhcp/dhcpd.conf
max-lease-time 7200;

allow booting;

subnet 192.168.56.0 netmask 255.255.255.0 {
  range 192.168.56.3 192.168.56.254;
  option broadcast-address 192.168.56.255;
  option routers 192.168.56.2;
  option domain-name-servers 192.168.56.2;
  option domain-name "myowndomain.com";
  next-server 192.168.56.2;
  filename "pxelinux.0";
}

group {
  next-server 192.168.56.2;
  host tftpclient {
    if option pxe-system-type = 00:07 {
      filename "debian-installer/amd64/bootnetx64.efi";
    } else {
      filename "pxelinux.0";
    }
  }
}
EOF
In addition, is also necessary to provide the interface that the dhcp server will use. In this case ‘eth1’.
cat <<EOF > /etc/default/isc-dhcp-server
INTERFACESv4="eth1"
INTERFACESv6=""
EOF
tftp server
The base config for the tftp server is quite simple:
cat <<EOF > /etc/default/tftpd-hpa
TFTP_USERNAME="tftp"
TFTP_DIRECTORY="/srv/tftp"
TFTP_ADDRESS="0.0.0.0:69"
TFTP_OPTIONS="--secure"
EOF
Then we copy all the debian installer files into the path that we are going to serve:
cp -R /usr/lib/debian-installer/images/11/i386/text/* /srv/tftp/pxelinux.cfg
Then we render the pxelinux.cfg/default file. In this file, we select the kernel, and pass variables to the kernel.
Some of these variables are repeated in the preseed file (covered later), but I found that the installation procedure did not get them. So they have to be explicitly stated in the kernel parameters.
Just for your information 192.168.56.2:3142 is apt-cacher-ng. So I’m telling the kernel that if it needs the security packages, it should get them from apt-cacher-ng.
cat <<EOF > /srv/tftp/pxelinux.cfg/default
path debian-installer/i386/boot-screens/
include debian-installer/i386/boot-screens/menu.cfg
default debian-installer/i386/boot-screens/vesamenu.c32
prompt 0
timeout 0

LABEL 1.0
        MENU LABEL Camilo
        KERNEL debian-installer/i386/linux
        APPEND auto=true preseed/url=tftp://192.168.56.2/preseed.cfg initrd=debian-installer/i386/initrd.gz  netcfg/no_default_route=true netcfg/dhcp_timeout=120 priority=critical DEBCONF_DEBUG=5 netcfg/get_ipaddress=192.168.56.3 netcfg/get_netmask=255.255.255.0 netcfg/get_gateway=192.168.56.2 netcfg/get_nameservers=192.168.56.2 apt-setup/security_host=192.168.56.2:3142
EOF
preseed.cfg
Then I render the preseed.cfg. I got this template of preseed somewhere, I searched for a preseed file that someone had customized before so that all installation questions were answered, however I don’t recall the source. I tweaked it a bit to serve my needs.
Below I paste a reduced version without comments. My objective is that no question is asked during the procedure, and to be able to create a user called ‘camilo’ with the password ‘cmpass’
cat <<EOF > /srv/tftp/preseed.cfg
d-i debian-installer/locale string en_US
d-i keyboard-configuration/xkb-keymap select us
d-i netcfg/choose_interface select auto
apt-setup-udeb    apt-setup/services-select   multiselect
d-i netcfg/get_ipaddress string 192.168.56.3
d-i netcfg/get_netmask string 255.255.255.0
d-i netcfg/get_gateway string 192.168.56.2
d-i netcfg/get_nameservers string 192.168.56.2
d-i netcfg/wireless_wep string
d-i mirror/country string manual
d-i mirror/http/hostname string 192.168.56.2:3142
d-i mirror/http/directory string /debian
d-i mirror/http/proxy string
d-i passwd/root-password password r00tme
d-i passwd/root-password-again password r00tme
d-i passwd/user-fullname string Camilo MATAJIRA
d-i passwd/username string cm
d-i passwd/user-password password cmpass
d-i passwd/user-password-again password cmpass
d-i clock-setup/utc boolean true
d-i time/zone string US/Eastern
d-i clock-setup/ntp boolean true
d-i partman-auto/method string lvm
d-i partman-auto-lvm/guided_size string max
d-i partman-lvm/device_remove_lvm boolean true
d-i partman-md/device_remove_md boolean true
d-i partman-lvm/confirm boolean true
d-i partman-lvm/confirm_nooverwrite boolean true
d-i partman-auto/choose_recipe select atomic
d-i partman-partitioning/confirm_write_new_label boolean true
d-i partman/choose_partition select finish
d-i partman/confirm boolean true
d-i partman/confirm_nooverwrite boolean true
d-i partman-md/confirm boolean true
d-i partman-partitioning/confirm_write_new_label boolean true
d-i partman/choose_partition select finish
d-i partman/confirm boolean true
d-i partman/confirm_nooverwrite boolean true
d-i apt-setup/cdrom/set-first boolean false
d-i apt-setup/services-select multiselect security, updates
d-i apt-setup/security_host string 192.168.56.2:3142
d-i    tasksel/first   multiselect Debian desktop environment, ... GNOME, standard system utilities
d-i pkgsel/run_tasksel boolean true
popularity-contest popularity-contest/participate boolean false
d-i grub-installer/only_debian boolean true
d-i grub-installer/with_other_os boolean false
d-i grub-installer/bootdev  string /dev/sda
d-i finish-install/reboot_in_progress note
EOF
DNS server
Below is the configuration of the DNS server.
However, I think maybe the DNS server is not necessary after all, given that I am getting all the packages from apt-cacher-ng. Anyway, this is the configuration I used.
cat <<EOF > /etc/bind/named.conf.options
acl allowed_clients {
  localhost;
  127.0.0.1;
  192.168.56.0/24;
};

options {
        directory "/var/cache/bind";

        # 10.0.2.3 is the DNS of virtualbox
        forwarders {
                10.0.2.3;

        };
        recursion yes;
        allow-query { allowed_clients; };
        allow-recursion { allowed_clients; };
        dnssec-enable yes;
        # the important one is dnssec-validation
        dnssec-validation yes;
        dnssec-lookaside auto;

        #listen-on-v6 { any; };
};
EOF
Router config
In the beginning, I thought that it may be necessary to configure the server as a router, so that the client could fetch the packages it needed, but with the introduction of apt-cacher-ng I think this is not necessary anymore:
echo "net.ipv4.ip_forward=1" > /etc/sysctl.conf
sysctl -p /etc/sysctl.conf

iptables -t nat -A POSTROUTING -o eth0 -j MASQUERADE
Testing the system with virtual machines
Below are some of the screenshot of testing this system with virtual machines.
The first is to ‘vagrant up’. You will see the following in Virtualbox:

The next step is to turn-off the ‘client’ virtual machine, and change the booting option, and disable the connection to the NAT. Why? Because if the machine is connected to two networks, it is possible that it will get the DHCP information from the wrong DHCP server. And also I am trying to replicate what the ‘real’ hardware environment will be.


Then we restart the machine. It will start to boot. We will see that it boots using iPXE. It will get the instructions from the DHCP server.

Part of the instructions is the Debian boot menu, which I modified adding the ‘Camilo’ option. We define the ‘Camilo’ option in the pxelinux.cfg/default file.

After it will start to install everything. Without need of human intervention.

We need to turn of the machine and rollback the boot options (we want the machine to boot using its own disk). And we turn it on again. Below is the welcome screen. See for example that the user is called ‘Camilo MATAJIRA’. I specified this in the preseed.cfg in the following line:
d-i passwd/user-fullname string Camilo MATAJIRA

The whole process takes around 8 minutes. It could take a bit longer if the cache is empty (if its the first time we run all the steps)
Testing the system with hardware
Testing with hardware was similar to the ‘dev’ environment with virtual machines. There was still debugging and troubleshooting.
At the end, I had to do several modifications to the scripts:
- Change the architecture from i386 to amd64 in all the script.
- After changing the architecture, the installer pose problems to fetch the bullseye-updates packages from apt-cacher-ng, so I had to remove the bullseye-updates from the preseed file (only fetch security updates)
#d-i apt-setup/services-select multiselect security, updates
d-i apt-setup/services-select multiselect security- Use the correct interface in the DHCP server configuration. In my case, it was changing “eth1” for “enp0s31f6”
- Configure your network interface appropriately and check that it works.
cat /etc/network/interfaces.d/extra
auto enp0s31f6
iface enp0s31f6 inet static
 address 192.168.56.2
 netmask 192.168.56.2
My setup looks like the picture below. Two laptops, the first on in which I executed ‘script_baremetal.sh’ and had isc-dhcp server, tftpd-ha, bind, apt-cacher-ng and the network installed and configured. A switch to connect the two laptops. And a laptop to be ‘installed’. To show the boot menu, I need to press F12 during the starting process. Afterward, choose to boot from the network.
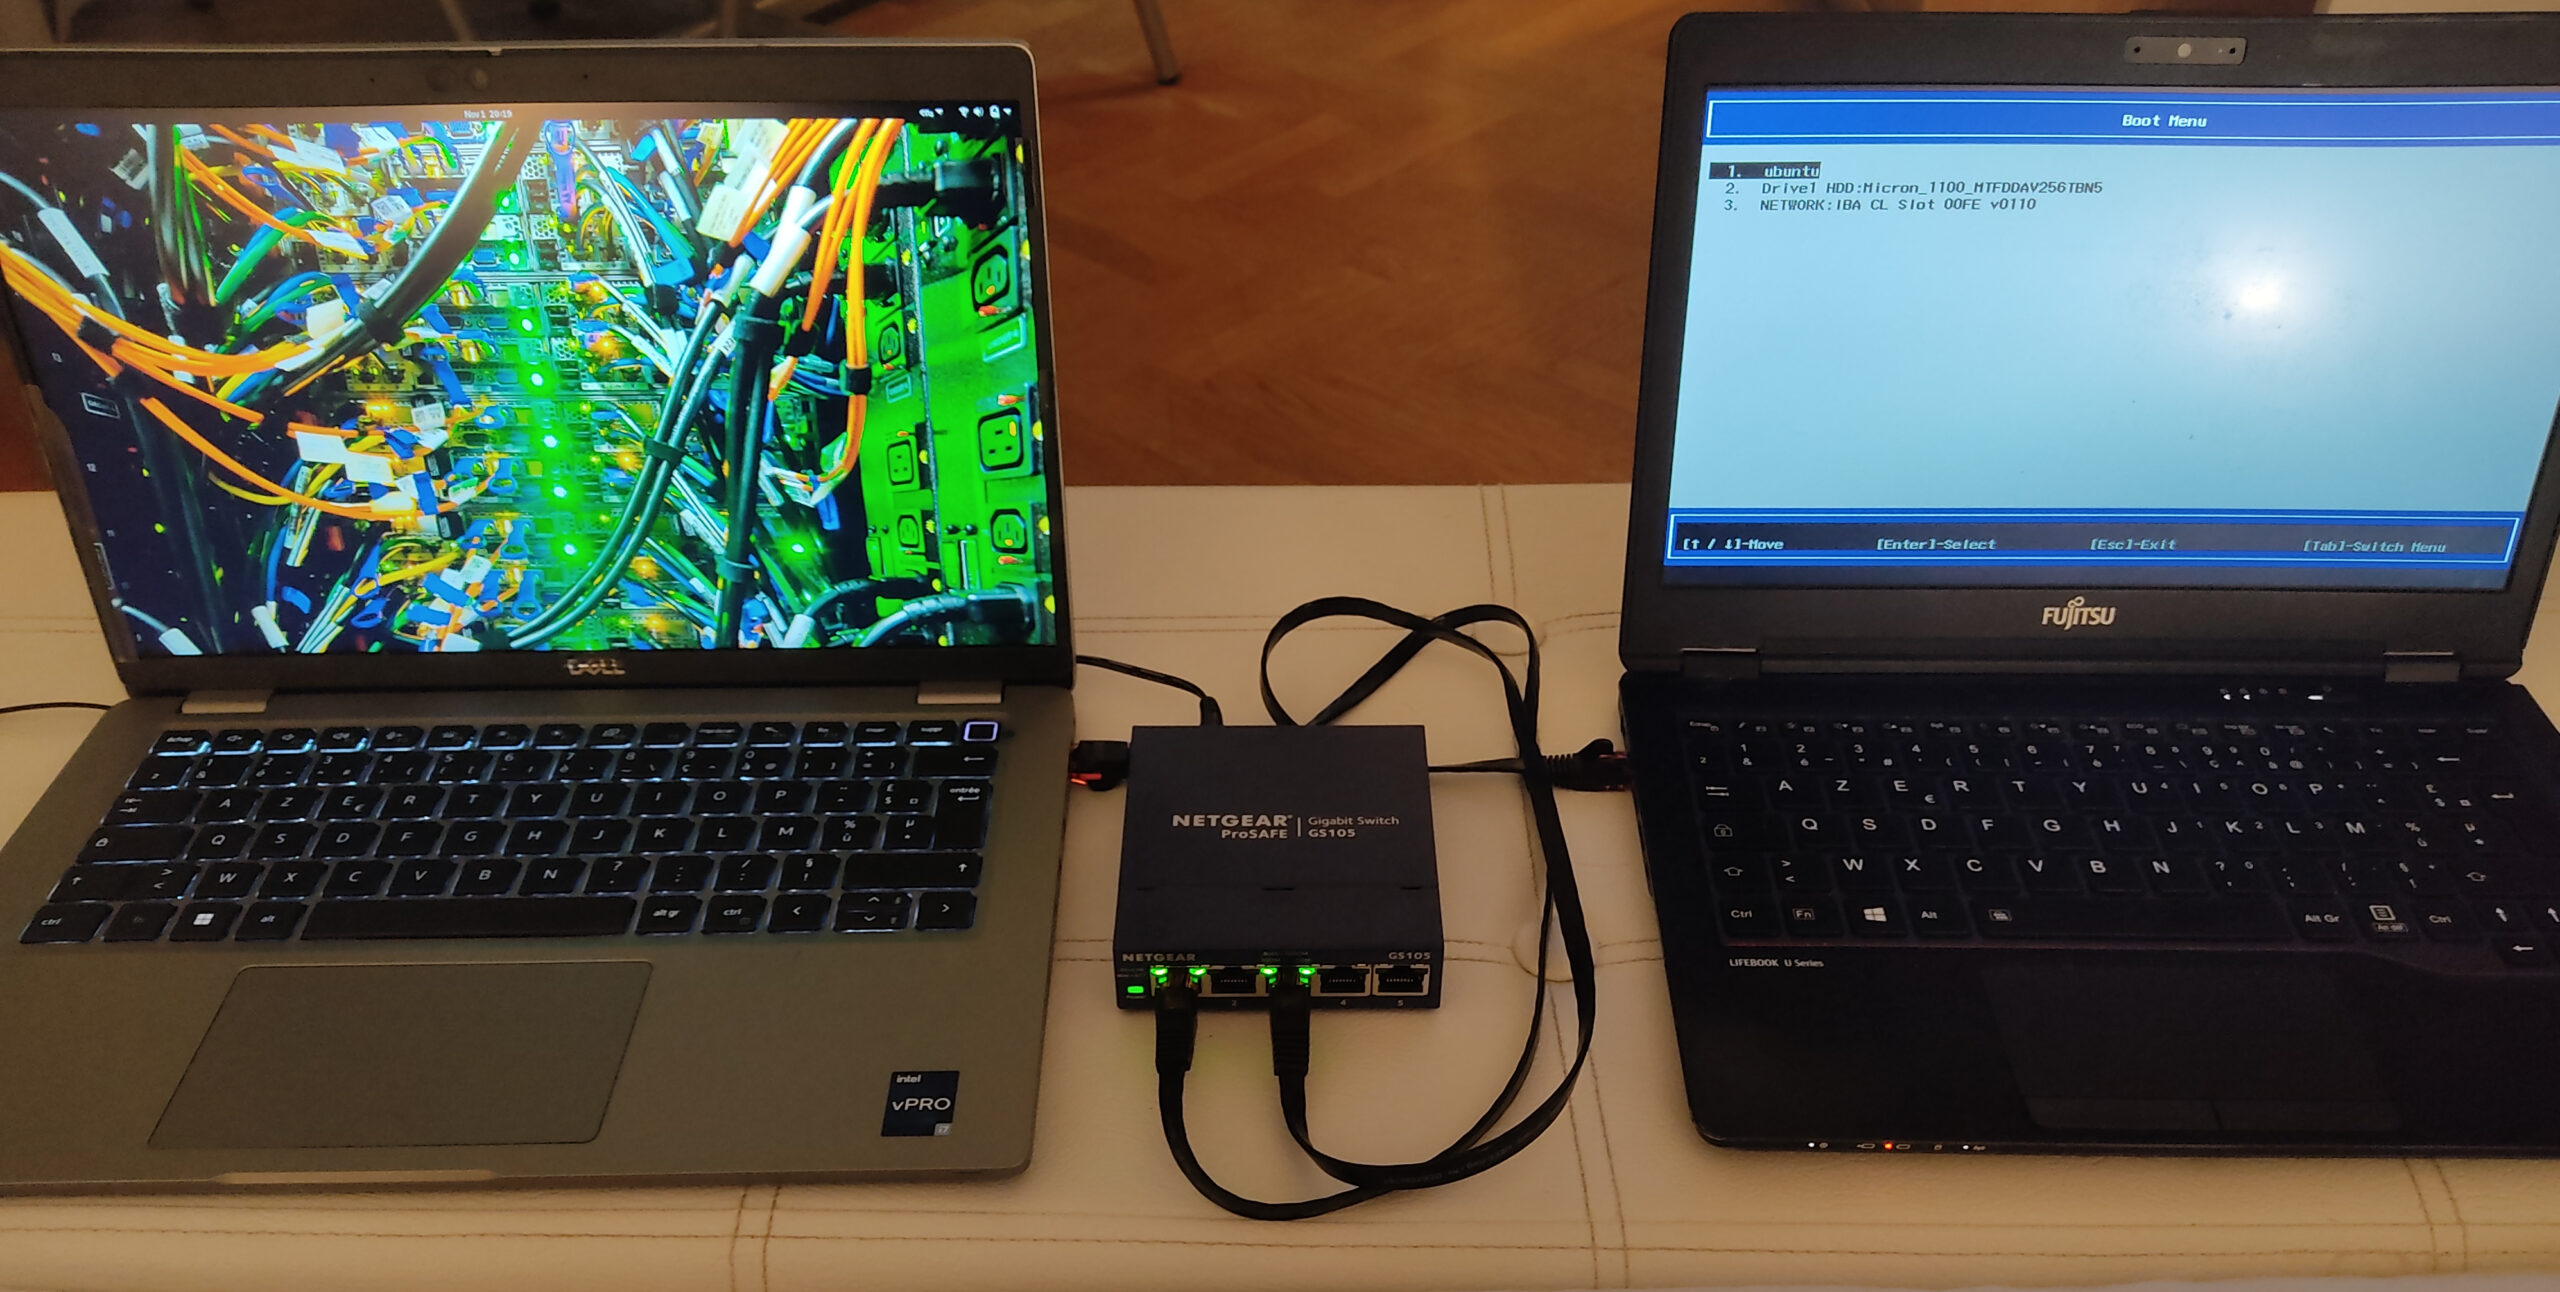
The laptop is able to get an IP address from the DHCP server, and starts to load the kernel and Debian installer from the TFTP:

Then the Debian installer shows up. And again, my personalized configuration appears ‘Camilo MATAJIRA’.
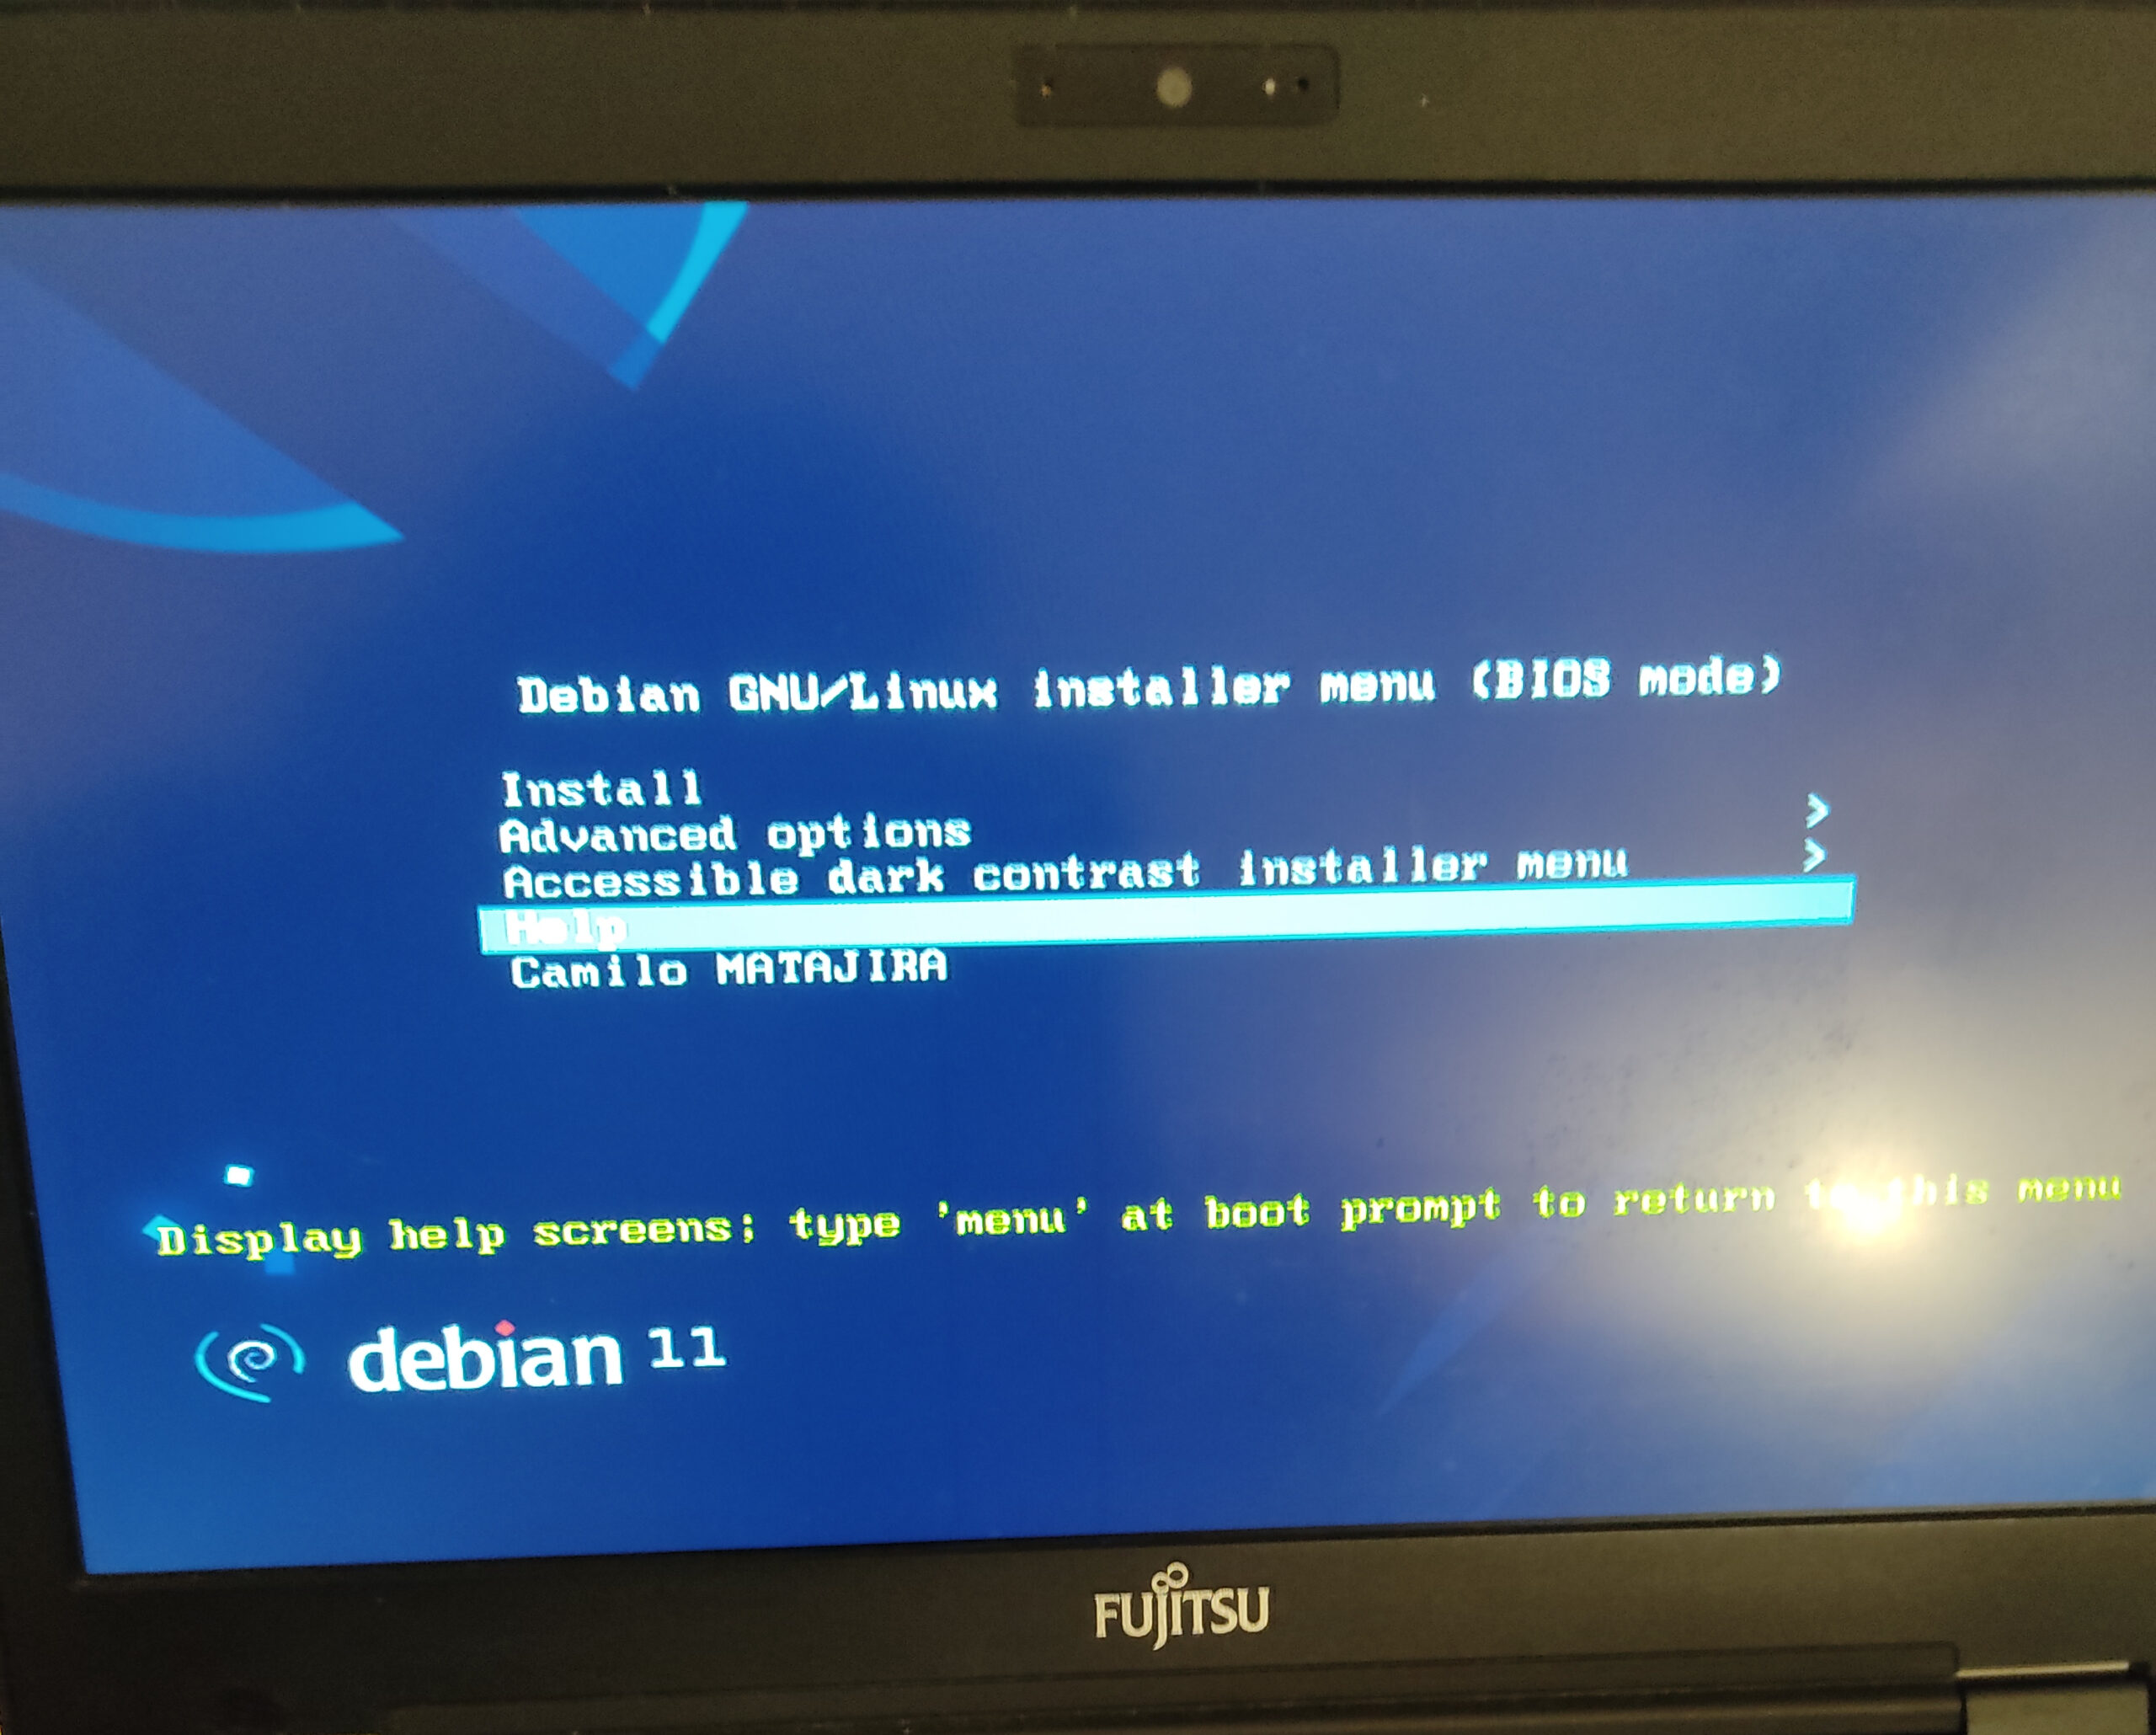
The automatic and unattended installation process begins:

The installation is finished, and the machine is rebooted. The login screen with my username appears:

Conclusion
At the end of the project I found a way of automating Debian server/laptop installation, with minimal human intervention and in an scalable way. Please check the final version of the git repository here: https://gitlab.com/matajira/pxe_boot .
The only human intervention would be to plug the two machines together, start the laptop, choose to boot from the network, and then select the configuration you created in the Debian Installation screen. The process with physical hardware takes around 10 minutes. And the machine is configured with the username and password that you provided in the configuration files. In other words, it is not a copy paste from a ‘Golden Image’, instead it is personalizable.
Perhaps a feature that I did not try in this project, and which is very interesting, is the late_command option:
#d-i preseed/late_command string apt-install zsh; in-target chsh -s /bin/zshThis will allow further customize the installation, via a bash script, or it allows to install an ssh key so that a configuration management tool continues the provisioning. That is an interesting feature to test in a next project.
Bonus: Ansible integration
To integrate this setup with Ansible to further customize your installation. I will start by creating a playbook.yml:
cat <<EOF > /srv/tftp/playbook.yml
---
- name: Install Ranger
  hosts: localhost
  remote_user: root

  tasks:
  - name: Ensure ranger is at the latest version
    ansible.builtin.apt:
      name: ranger
      state: latest
EOF
To be able to run this script we can take advantage of the late_command option in the preseed file. The late_command allows to run a command or script after the installation ends. In this case, we would like to execute ansible. For this, we will install the tftp client and also install ansible, then fetch the playbook.yml file, and then execute it:
    d-i preseed/late_command string in-target apt-get install -y tftp-hpa ansible; \
                   in-target tftp 192.168.56.2 -c get playbook.yml; \
                   in-target ansible-playbook playbook.yml -D